To remove an oil pan without removing the engine, first drain the oil and then unbolt the pan. Carefully pry the pan away using a gasket scraper, being cautious not to damage the engine block or pan surface.
Working on a vehicle presents its unique set of challenges and complexities, particularly when attempting tasks like removing an oil pan without hoisting out the engine. This procedure requires a blend of precision, patience, and the right approach to avoid causing any unintended damage.
Despite the space constraints typically involved, it is indeed possible to execute this maintenance task effectively. The process entails draining the engine oil, detaching all relevant bolts, and maneuvering the pan out from its position, all while leaving the engine in place. Engaging in this automotive repair requires a fundamental understanding of your vehicle’s layout, ensuring that you can navigate around any potential obstacles.
Removing Oil Pan Without Engine Removal
Confronted with the task of changing an oil pan, many might assume the entire engine must be removed. This, however, is not always necessary. The process of removing the oil pan without taking out the engine can be a very practical option for car owners. This approach often saves time and money while remaining within the reach of those with a decent mechanical background.
Cost-effective Option
- Less Labor: Significantly reduces the number of hours a mechanic will bill for.
- No Engine Hoist Required: Eliminates the need for specialized equipment to lift the engine out of the bay.
- Spare Parts: Limits the number of gaskets, hoses, and seals that may need replacement due to engine removal.
Suitable For Skilled Mechanics
- Proficiency in locating and safely securing car jacks and stands.
- Adequate knowledge about the oil pan’s position and the obstacles above it.
- Experience with various hand tools and equipment required for oil pan removal.
- Capability to replace the oil pan gasket meticulously to avoid leaks.
Tools And Materials
Welcome to the essential walkthrough on removing an oil pan without the hassle of removing the entire engine. This task, while delicate, can be executed with the right tools and precautions in place. Whether you’re a weekend DIY mechanic or a seasoned professional, the ensuing list ensures you gather all the necessary equipment and safety gear before diving into the removal process.
Essential Equipment
Essential Equipment
- Ratchet and socket set: To undo the bolts that fasten the oil pan.
- Screwdrivers: Both flathead and Phillips may be needed.
- Drain pan: To catch and contain the old oil.
- Engine hoist or jack: This aids in slightly lifting the engine to provide clearance if needed.
- Pry bar or gasket scraper: For removing the oil pan gently without damage.
Safety Gear Required
Safety Gear Required
- Work gloves: Durable gloves to protect your hands from oil and sharp edges.
- Safety glasses: Necessary to shield your eyes from any dropping debris or splashing fluids.
- Steel-toed boots: Strong footwear to protect your feet in case any heavy tools or parts are dropped.
Note that your vehicle’s make, model, and specific engine layout may require additional or unique tools. Always refer to the service manual for anything specific to your vehicle.
Preparation Steps
Embarking on the project of removing an oil pan without disturbing the engine is a task that requires meticulous preparation. Ensuring the proper preliminary steps are taken not only paves the way for a smoother operation, but it also safeguards your vehicle’s engine integrity. Let’s delve into the preparation phase to set the stage for a successful oil pan removal.
Drain Engine Oil
Drain Engine Oil
- Ensure the engine is cool to avoid burns from hot oil.
- Position a suitable oil drain pan beneath the engine to catch the oil.
- Remove the oil cap from the top of the engine to allow air to flow and facilitate draining.
- Use a socket wrench to carefully remove the oil drain plug and allow the oil to completely drain out.
Support Engine Properly
Support Engine Properly
- Use an engine hoist or jack with a block of wood to distribute the weight to gently lift the engine.
- Do not lift the engine excessively; a small amount of clearance is usually sufficient.
- Ensure the engine’s weight is evenly supported to prevent any tilting or damage.
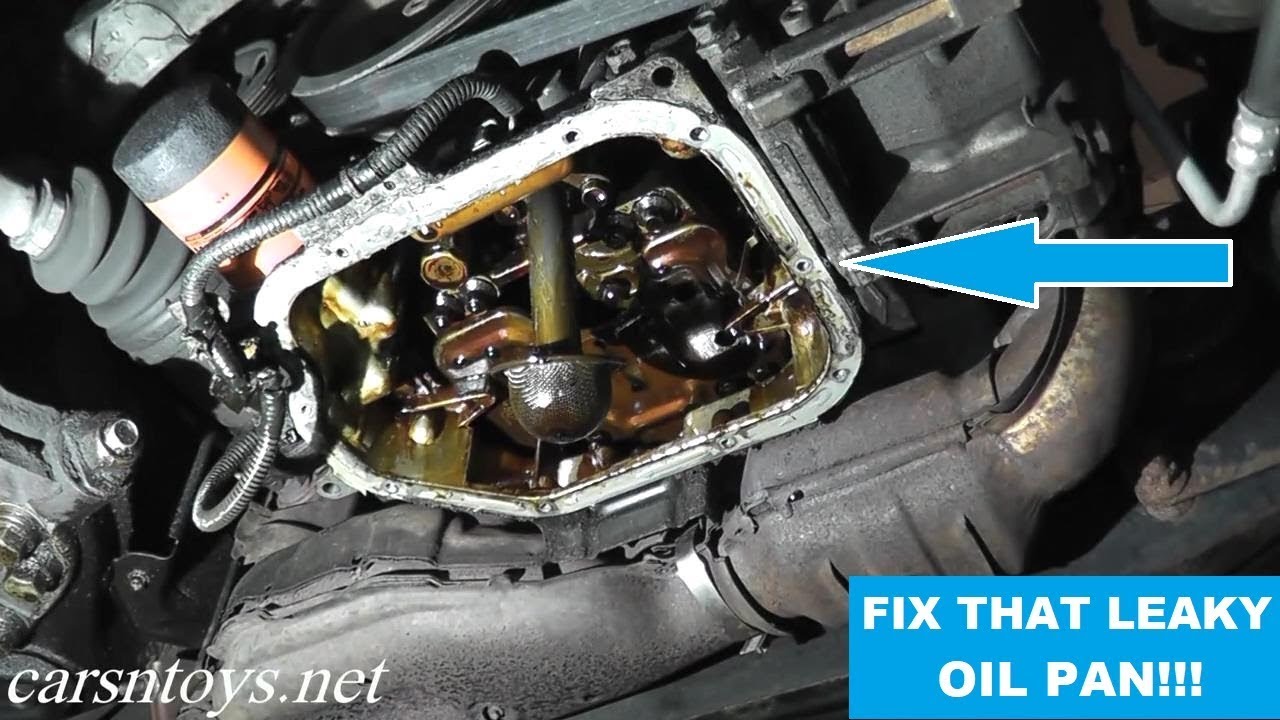
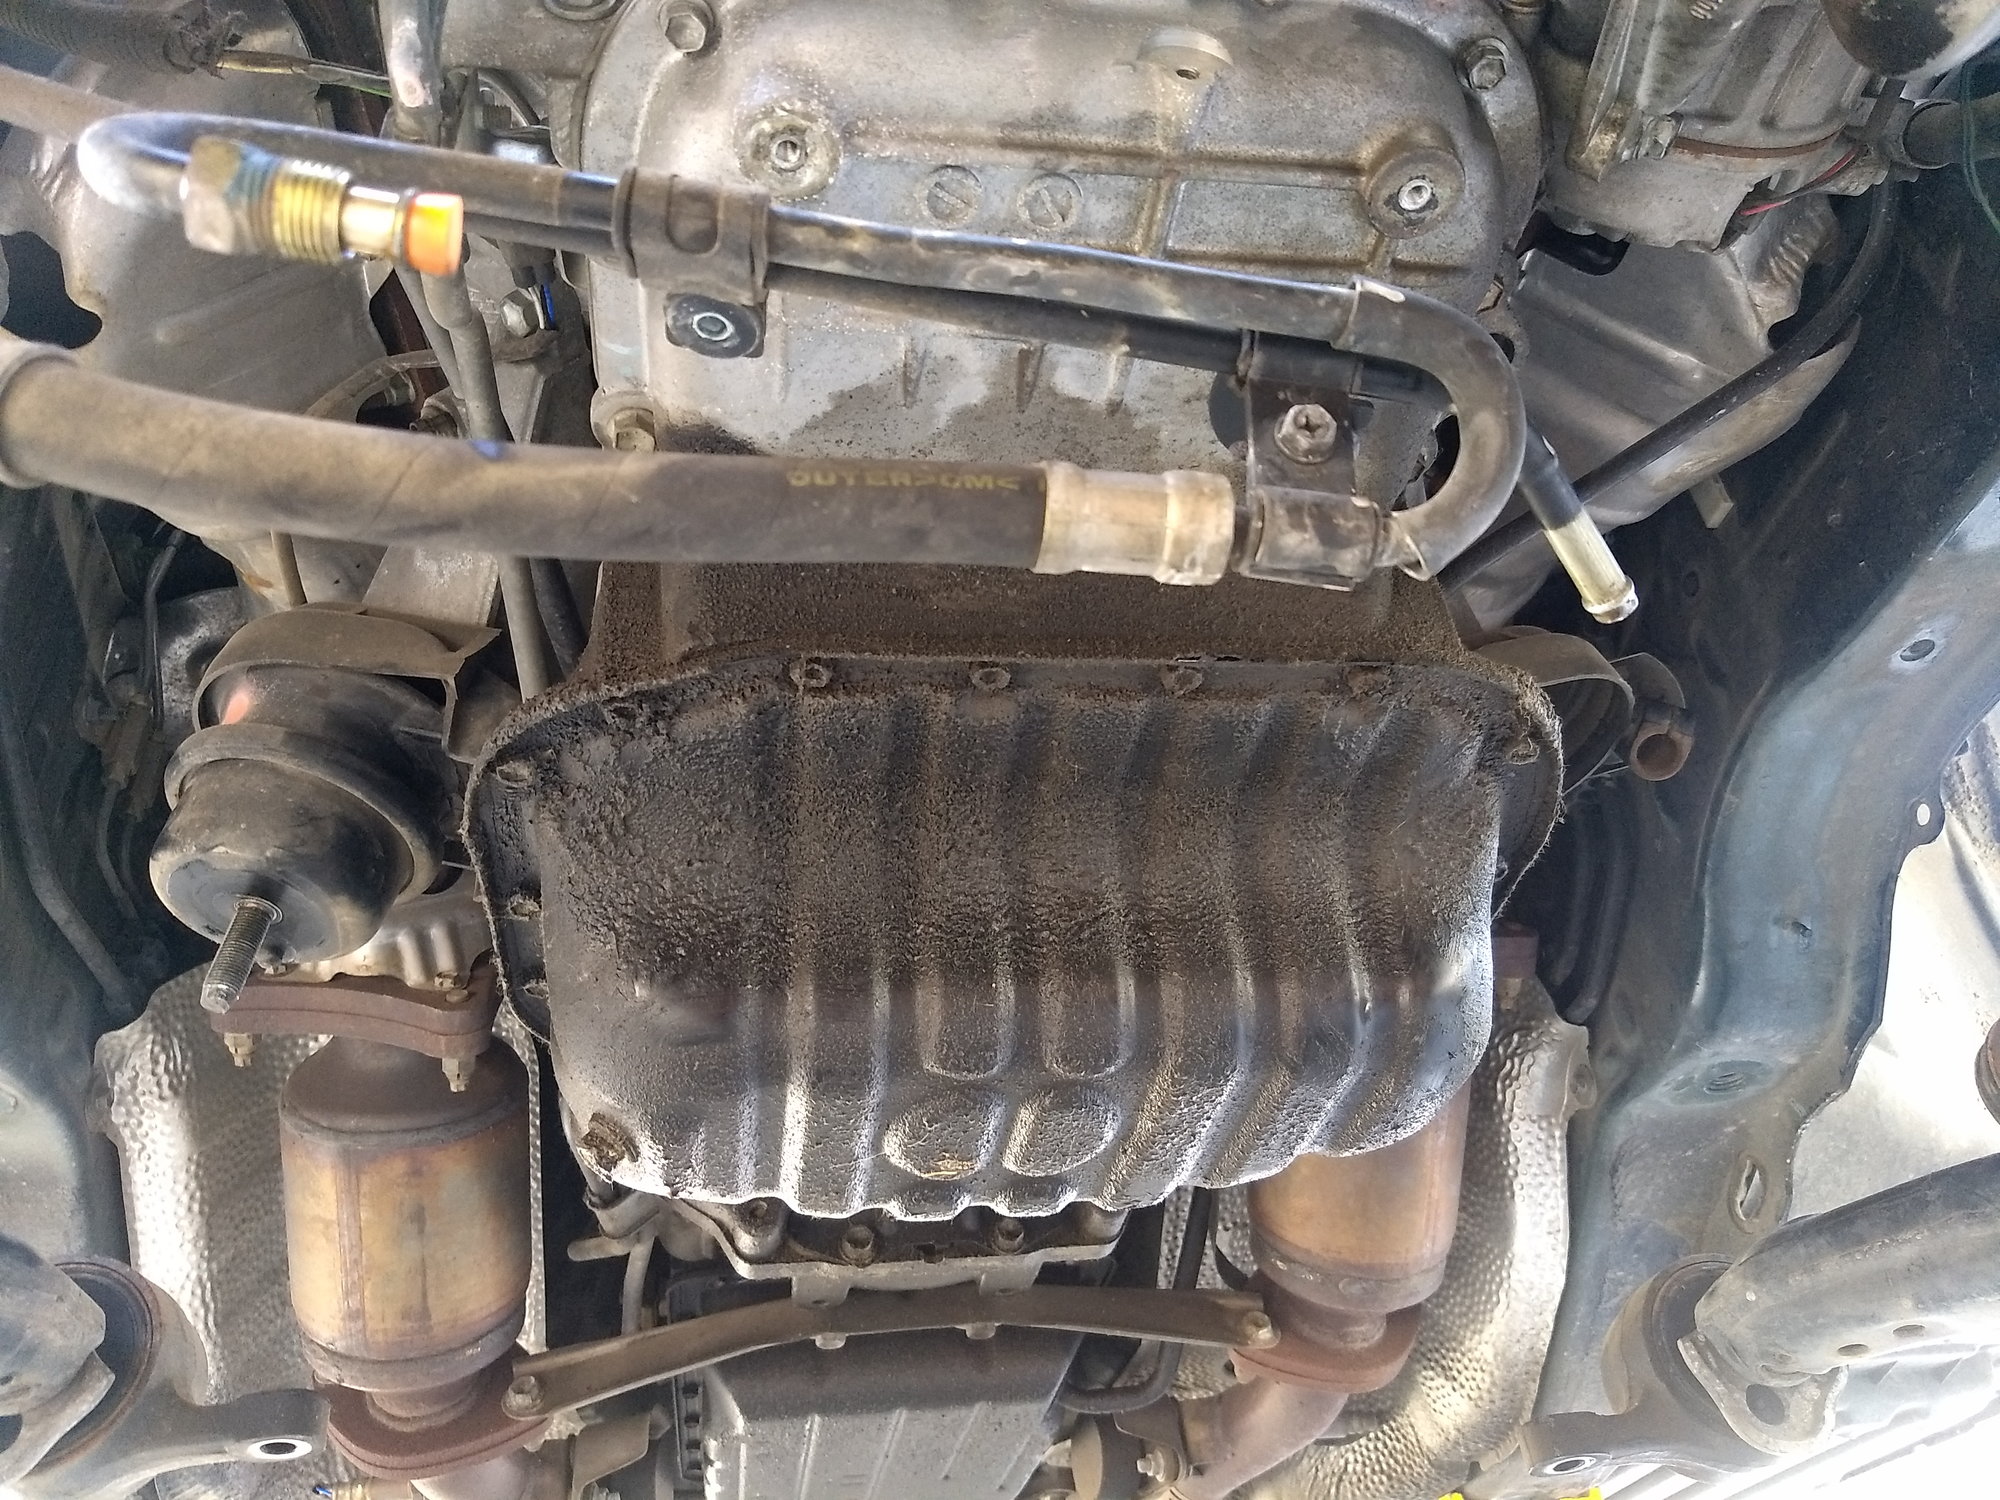
Removing Oil Pan
Extracting an oil pan can be a manageable task even with the engine in place. Drain the oil, then unbolt the pan with appropriate tools to access and replace without full engine removal. This technique ensures a smooth maintenance process for vehicle enthusiasts and mechanics alike.
Loosen And Remove Bolts
Progress with caution:
- Position a drain pan underneath the oil pan.
- Loosen each bolt slightly, moving in a crisscross pattern to evenly distribute the release of tension.
- Once all bolts are loosened, completely remove them. Keep track of all bolts and store them safely to prevent loss.
With the bolts removed, ensure the area is clear. The oil pan might still cling to the gasket or sealant, so be prepared for gentle separation.
Carefully Lower The Pan
Follow these steps for a safe removal:
- Inspect the pan for any remaining connectors or obstructions.
- If needed, use a rubber mallet to gently tap the pan to facilitate loosening.
- Gently wiggle the pan to detach it from the seal. Avoid using excessive force, which could bend or damage the pan.
- When the pan is free, carefully lower it, ensuring any remaining oil is caught by the drain pan.
With the oil pan successfully lowered, you can proceed with cleaning, repair, or replacement as needed. Be sure to prepare the new gasket and surfaces for a secure, leak-free installation.
Installing New Gasket
After successfully removing your vehicle’s oil pan without the cumbersome task of removing the engine, it’s crucial to ensure the longevity and effectiveness of your repair by installing a new gasket correctly. The gasket is your safeguard against oil leaks, and hence, precise installation is non-negotiable. In this section, we’ll walk you through preparing the surface and positioning the new gasket, with the goal of providing a leak-proof seal that keeps your engine running smoothly.
Ensure a Clean Surface
Ensure A Clean Surface
- Begin by scraping off any old gasket material using a gasket scraper or putty knife, taking care not to scratch the surface.
- Use a solvent or degreaser to wipe away any remaining oil or grime.
- Dry the surface thoroughly and inspect it for any irregularities or damage.
- If a high-quality sealant is recommended for your gasket, apply it as per the instructions provided.
Properly Position the Gasket
Properly Position The Gasket
- Lay the new gasket onto the engine block, ensuring that all holes align precisely with the block’s ports.
- Use alignment dowels or a few bolts to loosely secure the gasket into its proper position, preventing any movement as you continue.
- Do not use adhesives unless specified by your gasket manufacturer, as this could complicate future repairs.
- Tighten the oil pan bolts by hand initially, then torque them to the manufacturer’s specifications in the sequence recommended.
Additional Tips
Remember to keep your workspace clean and organized, and double-check your vehicle’s service manual for any specific requirements. With patience and attention to detail, you’ll have your oil pan secured and ready for miles of trouble-free driving.
Frequently Asked Questions For How To Remove Oil Pan Without Removing Engine
How Do You Pry An Oil Pan Off?
Drain the oil, remove all pan bolts, gently tap pan with rubber mallet to loosen, then carefully pry off using a gasket scraper. Avoid damaging mating surfaces.
How Hard Is It To Remove Oil Pan?
Removing an oil pan can range from moderately to very difficult. The complexity depends on the vehicle model, as accessibility varies. Some cars may require removing additional components or lifting the engine.
How Do You Remove Buildup From An Oil Pan?
Drain the oil completely first. Use a scraper to remove the gasket and buildup. Then, clean with a degreaser and dry with a rag.
How Much Does It Cost To Fix The Oil Pan?
Repairing an oil pan typically costs between $300 to $850, depending on vehicle make and labor costs.
Conclusion
Mastering the art of removing an oil pan without having to detach the engine is a valuable skill for any DIY mechanic. Armed with the right tools and this guide’s step-by-step approach, the task becomes manageable, even for novices. Remember, proper patience and attention to detail will ensure a smooth process and prevent any unnecessary damage.

Leave a Reply