To reset the Chevy oil light, follow these steps: start the vehicle, but do not start the engine. Depress the accelerator pedal three times within five seconds.
Wait for the light to flash, confirming the reset. Alternatively, consult the vehicle’s manual for specific instructions. Maintaining your Chevy’s oil is crucial to ensure its optimal performance. Over time, the oil light might illuminate on your dashboard, indicating the need for an oil change or service.
However, resetting this light after an oil change can often prove to be confusing for some Chevy owners. Fortunately, resetting the oil light is a straightforward process that can be done within a few minutes. In the following sections, we will provide you with a concise guide on how to reset the Chevy oil light in a few easy steps, allowing you to ensure your vehicle’s performance and longevity.
Understanding The Chevy Oil Light Indicator
Learn how to easily reset the oil light indicator on your Chevy vehicle with these simple steps. Keep your engine running smoothly and efficiently by understanding the Chevy oil light indicator and taking quick action when needed.
Whether you are a seasoned Chevy owner or a newbie, understanding the Chevy oil light indicator is crucial for maintaining the health of your vehicle. The oil light serves as a warning system that alerts you when there is an issue with your engine’s oil levels or pressure. Ignoring this indicator could lead to severe engine damage and costly repairs. In this article, we will dive deep into what the Chevy oil light indicator means and why it is essential to address it promptly. Let’s get started!
What Does The Chevy Oil Light Indicator Mean?
When the Chevy oil light illuminates on your dashboard, it is a clear indication that there is an issue with your engine’s oil. This warning can be triggered by various factors, including low oil level, improper oil pressure, or other problems affecting the oil’s ability to lubricate the engine effectively. It is essential to note that the specific meaning of the oil light indicator may vary depending on the Chevy model you own. However, in most cases, it is a sign that you should take immediate action to prevent further damage.
Importance Of Addressing The Oil Light Indicator Promptly
Promptly addressing the Chevy oil light indicator is of utmost importance to maintain the overall health and performance of your vehicle. Ignoring this warning can have severe consequences, such as engine overheating, excessive wear and tear, and even complete engine failure. Failing to take action when the oil light illuminates can result in costly repairs and possibly render your Chevy inoperable. By addressing the issue promptly, you not only safeguard your vehicle but also ensure your safety on the road.
Common Reasons For The Oil Light To Illuminate
Understanding the common reasons behind the oil light illuminating can help you troubleshoot the issue more effectively. Here are some common culprits for the Chevy oil light indicator coming on:
| Issue | Possible Cause |
|---|---|
| Low Oil Level | The oil level in your engine may be too low, indicating a potential leak or consumption. |
| Oil Pressure Problems | Your engine may be experiencing inadequate oil pressure caused by a faulty oil pump or clogged oil filter. |
| Oil Sensor Malfunction | The oil sensor, responsible for monitoring oil levels and pressure, may be faulty or disconnected. |
| Engine Overheating | An overheating engine can cause the oil to break down, leading to low oil pressure and triggering the oil light indicator. |
Ensuring prompt and accurate diagnosis of the issue is crucial to effectively reset the Chevy oil light and prevent further complications. It is recommended to consult your vehicle’s manual or seek professional assistance to identify and resolve the problem.
Remember, the Chevy oil light indicator should never be neglected. Understanding what it means, the importance of addressing it promptly, and the common reasons behind its illumination will empower you to take the necessary steps to maintain your Chevy’s optimal performance. By resetting the oil light in a timely manner, you can protect your engine, your investment, and enjoy a worry-free drive.

Credit: www.wikihow.com
Gathering The Required Tools And Materials
If you own a Chevy vehicle and need to reset the oil light, it’s essential to gather the necessary tools and materials beforehand. By having everything you need within reach, you can ensure a smooth and hassle-free process. In this section, we will discuss the specific tools and materials you’ll require, as well as where you can acquire them. Let’s get started!
Tools Needed For Resetting The Chevy Oil Light
Resetting the oil light in your Chevy vehicle might seem daunting, but with the right tools, it can be a breeze. Here are the essential tools you’ll need for the process:
- Diagnostic scan tool
- OBD-II scanner
- Vehicle owner’s manual
- Wrench or socket set
These tools will help you diagnose the issue, access the vehicle’s OBD-II port, and perform the necessary reset.
Materials Required For The Process
Along with the tools, there are a few materials that you’ll need to successfully reset the Chevy oil light. Here’s what you’ll require:
- Clean cloth or towel
- New oil filter (optional)
- New engine oil (as per your vehicle’s specifications)
Having a clean cloth or towel will ensure that you can wipe away any dirt or debris that might be present during the process. Moreover, having a new oil filter and engine oil on hand is recommended if you plan on performing an oil change simultaneously.
Where To Acquire The Necessary Tools And Materials
Now that you know what tools and materials you need, it’s essential to find where you can acquire them. Here are a few options to consider:
- Automotive supply stores: These specialized stores offer a wide range of tools and materials specifically for automotive maintenance. They are likely to have diagnostic scan tools, OBD-II scanners, oil filters, and engine oil available.
- Online retailers: Websites like Amazon, eBay, and specialized automotive online stores provide the convenience of purchasing tools and materials from the comfort of your home. Ensure you read reviews and select reputable sellers to avoid counterfeit products.
- Local auto parts stores: Check with your local auto parts store, as they may have the tools and materials you require. They can also provide valuable assistance and guidance.
By exploring these options, you can find the necessary tools and materials conveniently while ensuring their quality and compatibility with your Chevy vehicle.
Step 1: Locating The Chevy Oil Light Reset Button
Resetting the oil light on your Chevy vehicle is an important maintenance task to ensure your engine stays in peak condition. Finding the location of the oil light reset button may vary depending on the model of your Chevy. In this step-by-step guide, we will walk you through how to locate the oil light reset button in different Chevy models, helping you reset the light quickly and easily.
Finding The Location Of The Oil Light Reset Button In Different Chevy Models
Each Chevy model may have a slightly different placement for the oil light reset button. Knowing where to find it in your specific vehicle will save you time and frustration. Here are some key details on locating the oil light reset button in various Chevy models:
Identifying The Specific Placement In Your Chevy Vehicle
To identify the exact placement of the oil light reset button in your Chevy vehicle, refer to the owner’s manual for your specific model. The owner’s manual is a comprehensive guide that contains valuable information about your vehicle’s features and maintenance. Look for the section on resetting the oil light or a diagram that highlights the location of the reset button.
If you don’t have access to the owner’s manual, you can still locate the oil light reset button by using a simple method. Start by examining the dashboard of your Chevy vehicle and look for a small button or indicator labeled “reset,” “oil,” or with a similar symbol. The reset button is typically located near the speedometer or other dashboard controls.
Alternatively, you can also try utilizing the information available online. Many Chevy owners share their experiences and tips on forums or automotive websites, which can provide valuable insights into finding the oil light reset button specific to your model.
Once you have successfully located the oil light reset button in your Chevy vehicle, you are now ready to move on to the next step and reset the oil light. Stay tuned for our upcoming blog post on the remaining steps to reset the oil light in your Chevy!
Step 2: Turning On The Ignition
To reset the oil light on your Chevy, start by turning on the ignition. This simple step will help you get your vehicle back on track and ensure proper maintenance.
Turning The Key In The Ignition To An Accessory Position
Now that you have completed the first step of gathering the necessary tools and materials, it’s time to move on to the next step in resetting the oil light on your Chevy. Step 2 involves turning the key in the ignition to an accessory position.
Turning the key in the ignition to an accessory position is a crucial step in the reset process. By doing this, you will be able to access the settings and controls of your vehicle’s onboard computer system, which is necessary for resetting the oil light.
Start by inserting the key into the ignition slot. Make sure the key is fully inserted and in the off position. Then, turn the key one click forward to the accessory position.
The accessory position is typically labeled with the symbol of a key or a circle with a line on top. It is the position just before the engine is started. When you turn the key to this position, the electrical components of your vehicle will power on, but the engine itself will not start.
By turning the key to the accessory position, you are allowing the onboard computer system to receive power and initiate the reset process. This position allows you to access the computer system’s settings without actually starting the engine.
Once you have turned the key to the accessory position, you may notice that certain dashboard lights or warning messages appear. This is normal and not a cause for concern. These lights and messages indicate that the electrical components are functioning properly.
Remember to be cautious while turning the key to the accessory position. Avoid turning it too forcefully or abruptly, as excessive force can potentially cause damage to the ignition mechanism or the key itself.
Now that you have successfully turned the key in the ignition to an accessory position, you are ready to move on to the next step in resetting the oil light on your Chevy.
Step 3: Resetting The Chevy Oil Light
Resetting the Chevy oil light is a simple process that can be done in a few quick steps. By following the manufacturer’s instructions, you can easily clear the oil light and ensure optimal vehicle performance.
Step-by-step Instructions For Resetting The Oil Light
Resetting the oil light in your Chevy vehicle is a simple process that you can do yourself. By following these step-by-step instructions, you can quickly and easily reset the oil light and ensure proper maintenance of your vehicle.
- Start by turning the ignition key to the “On” position without starting the engine. This is typically the second position on most Chevy vehicles.
- Locate the “Set” or “Reset” button on the instrument cluster. The location of this button may vary depending on the model of your Chevy, so refer to your owner’s manual if you can’t find it.
- Press and hold the “Set” or “Reset” button for about 10 seconds. This will activate the oil light reset mode.
- Release the button once the oil light begins to flash or a message appears on the instrument cluster. This indicates that the reset process has been initiated.
- Wait for the oil light to stop flashing or for the message to disappear. This may take a few seconds or up to a minute, depending on the model of your Chevy.
- Turn the ignition key to the “Off” position and then back to the “On” position. The oil light should no longer be illuminated, indicating that the reset was successful.
Different Methods For Resetting The Oil Light In Various Chevy Models
While the above step-by-step instructions should work for most Chevy models, some vehicles may have slightly different procedures for resetting the oil light. Here are a few alternative methods you can try:
| Chevy Model | Reset Method |
|---|---|
| Chevy Silverado | Press and release the accelerator pedal three times within five seconds after turning the ignition key to the “On” position. |
| Chevy Malibu | Turn the ignition key to the “On” position and immediately press the gas pedal three times within five seconds. Wait for the oil light to flash and go out to indicate a successful reset. |
| Chevy Equinox | Turn the ignition key to the “On” position and fully press the accelerator pedal three times within five seconds. Wait for the oil light to turn off to confirm the reset. |
Remember to always consult your owner’s manual for the specific reset procedure for your Chevy model, as different vehicles may have different methods.
Step 4: Verifying A Successful Reset
After performing the necessary steps to reset the oil light on your Chevy, it is crucial to ensure that the reset process was successful. Verifying a successful reset will give you peace of mind, knowing that the oil light indicator has been properly cleared. Here are a few simple checks you can perform to confirm that the reset was indeed successful.
Checking The Dashboard For The Absence Of The Oil Light Indicator
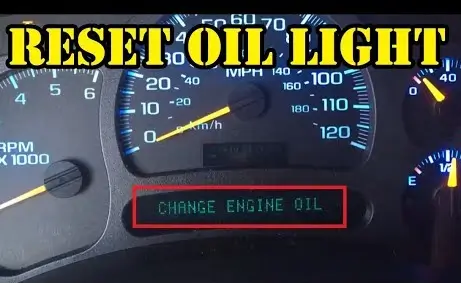
One of the first things you should do to verify a successful reset is to check the dashboard for the absence of the oil light indicator. The oil light indicator is typically represented by an image of an oil can or the word “OIL.” Take a moment to carefully examine the dashboard and ensure that the oil light is no longer illuminated. If you cannot find the oil light indicator, congratulations! You have successfully reset the oil light on your Chevy.
Confirming That The Reset Process Was Successful
It’s not enough to simply rely on the absence of the oil light indicator on the dashboard. Confirming the success of the reset process is equally important. To do this, you can follow these steps:
- Start your Chevy and let the engine run for a couple of minutes.
- Observe the dashboard carefully for any signs of the oil light coming back on.
- Listen for any unusual noises or vibrations that may indicate an oil-related issue.
- If the oil light remains off and there are no concerning sounds or vibrations, it means that the reset process was successful.
Remember, it’s essential to perform these checks to ensure the entire reset process was completed correctly. Failing to verify a successful reset could lead to ongoing issues with your Chevy’s oil system and potentially cause damage to your vehicle.
By following these simple steps, you can confidently verify that the reset of the oil light on your Chevy was successful. Now you can drive with peace of mind, knowing that your vehicle’s oil system is functioning properly, and you have taken the necessary steps to maintain its performance and longevity.
Additional Tips And Precautions
Resetting the oil light on your Chevy is a straightforward task that can help ensure your vehicle’s optimal performance. However, there are some additional tips and precautions that you should keep in mind to make the process even smoother and prevent any potential damage. In this section, we will discuss maintenance recommendations for keeping the oil light indicator at bay and precautions to take while resetting the light.
Maintenance Recommendations For Keeping The Oil Light Indicator At Bay
Maintaining proper oil levels and adhering to regular oil change intervals are essential for keeping the oil light indicator from troubling you. Here are some maintenance recommendations:
- Check your oil regularly: Make it a habit to check your oil at least once a month or before long trips. This simple step can help you detect any oil leaks or low levels early on.
- Frequent oil changes: Stick to your vehicle’s recommended oil change schedule. Regular oil changes not only keep your engine well-lubricated but also contribute to its longevity.
- Choose the right oil: Always use the oil recommended by the manufacturer for your specific Chevy model. Using the wrong oil can negatively impact the engine’s performance and trigger the oil light.
- Inspect the oil filter: During oil changes, ensure your mechanic replaces the oil filter. A clogged or dirty oil filter can impede the flow of oil, leading to potential engine damage.
- Address oil leaks promptly: If you notice any oil leaks, have them fixed as soon as possible. Ignoring leaks can result in low oil levels and subsequent oil light activation.
Precautions To Prevent Damage During The Reset Process
While resetting the Chevy oil light is a relatively simple task, it’s important to exercise caution to prevent any unintended damage. Here are some precautions you should observe:
- Follow the correct procedure: Ensure you follow the correct steps outlined in your vehicle’s manual or reliable online sources when resetting the oil light. Skipping or incorrectly performing any step can lead to improper resetting or additional complications.
- Use the right tools: Make sure you have the appropriate tools required for the reset process. Using the wrong tools can potentially damage essential components.
- Avoid applying excessive force: When manipulating any buttons or switches during the reset, be gentle and avoid applying excessive force. Mishandling can lead to accidental breakage or malfunction.
- Do not reset without addressing the underlying issue: If the oil light indicator keeps coming back after resetting multiple times, it may be an indication of an underlying problem. In such cases, it’s crucial to diagnose and rectify the issue rather than simply resetting the light repeatedly.
- Consult a professional if unsure: If you are unsure about the reset process or encounter any difficulties, it’s always best to consult a professional mechanic or refer to the vehicle’s manual for guidance.
By adhering to these maintenance recommendations and taking the necessary precautions, you can keep your Chevy’s oil light at bay and perform the reset process smoothly without encountering any issues or potential damage. Remember, regular maintenance is key to the optimal performance and longevity of your vehicle.
Frequently Asked Questions On How To Reset Chevy Oil Light
How Do I Reset The Oil Light On My Chevy?
To reset the oil light on your Chevy, follow these steps:
1. Turn the ignition key to the “on” position without starting the engine. 2. Press the accelerator pedal to the floor three times within five seconds. 3. Wait for the oil light to flash and then turn off. This indicates that the oil light has been reset successfully.
Why Is My Chevy Oil Light On?
There are several reasons why the oil light on your Chevy may be on, including:
1. Low oil level: Check the oil level and add more if necessary. 2. Oil pressure problems: The oil pump or pressure regulator may be malfunctioning. 3. Oil filter issues: A clogged or faulty oil filter can cause low oil pressure. It’s important to address these issues promptly to prevent engine damage.
How Often Should I Reset The Oil Light On My Chevy?
You should reset the oil light on your Chevy after each oil change. This ensures that the oil change interval is accurately tracked by the vehicle’s computer system. However, if the oil light stays on after being reset or comes on between oil changes, it may indicate a problem that requires attention from a mechanic.
Conclusion
Resetting the oil light in your Chevy is a simple process that can be done quickly and easily. By following the steps outlined in this guide, you can avoid unnecessary trips to the mechanic and save yourself time and money.
Remember to always consult your vehicle’s manual for specific instructions, as different Chevy models may have slightly different procedures. With a little patience and the right knowledge, maintaining your Chevy’s oil light will be a breeze. Keep your Chevy running smoothly and enjoy the peace of mind that comes with a properly maintained vehicle.
Leave a Reply